Starting Up HLDSNow that you have HLDS and have learned some basics about it in the last section, it's time to start the real fun! This section is all about starting up and running HLDS. Starting it up
How to start up HLDS? The question isn't how to start it, but what technique to use to do this. That's because there are two modes that HLDS can use to run: GUI and Console. Let's compare them both: | GUI Advantages: Easy to start (no dealing with parameters) Graph statistics about players, FPS (this is not Frames Per Second!), ping and CPU usage Easy to manage CVARs and to configure the server
Disadvantages: Takes up RAM and CPU cycles Impossible to run in service mode Impossible to make it start as soon as Windows is booted. Impossible to input parameters for easier startup
| Console Advantages: Uses less RAM and less CPU because it doesn't generate graph statistics Possible to run in Service mode (see the service sub-section) Possible to make it start as soon as Windows is booted
Disadvantages: |
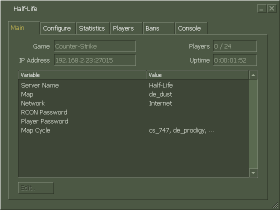
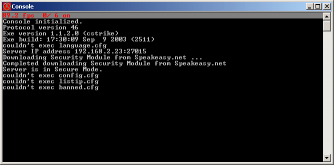
As you can see, the console provides us with overall advantages and the GUI is only made for "easier" management... But, you can have even easier management than that by installing plugins (discussed later in this guide). Here's a comparison of how the two look like: 
GUI | 
Console |
So here's how to start HLDS on Steam and on the standalone: Steam Integrated HLDS
You only have the option to start in GUI mode, simply double click on "Dedicated Server" on the Steam games menu and voila! Standalone HLDS
Navigate to the folder that you installed HLDS (default is: C:\HLserver\) and execute HLDS.exe. If you want to run it in Console mode, look at the next sub-section (named Parameters). | 

